Tuesday, July 31

Craft Room Peg Board

 
Recently David and I moved into together. We found a really cute 3 bedroom, 2 bath rental house for a great price in a nice area of Houston. The best part about have 3 bedrooms, is that the third bedroom could be completely dedicated to an office/craft room! EEK! My very own space for crafting! I was so excited about that.

I really wanted to add some color to the room, but since the house is a rental I had to figure out something besides painting the walls.While racking my brain for ideas and browsing craft rooms on pinterest, I stumbled across peg boards.

What a great idea! You can spray paint them any color you want, and it also acts as decoration and a storage solution!

Supplies (from Home Depot)
Peg Board - $8.17 (24in x 48in)
Spray Paint - $3.87 (in Aqua)
Peg Board Hooks - $7.48 (The package I bought also comes with the things necessary to mount the board)

Total: $19.52 - You really can't beat that!!


Once you have your supplies you are ready to get started!

First find a large sheet or piece of card board to lay down so you don't have colored polka dots all over your lawn. I used a left over ikea box I saved for project's like these.


Now Spray Paint! I put on two coats of paint.


Next find an awesome fiance to help hang the peg board on the wall. Be sure to get the peg board on studs. You will be constantly adding weight to the peg board and you don't want it to fall on your head!

He is soo excited!
Finally, ACCESSORIZE! I still need to figure out what else I want to hang on the board, but for right now its a great start!


What interesting way's have you organized your craft room?

Monday, July 30

Wedding Party Name Tags


This past weekend David and I’s moms hosted us an engagement party. It was going to be the first time our extend families had officially met, and the first time any of the families had met our wedding party. With a RSVP list of around 45 people I knew it would be hard to make sure every bridesmaid and groomsmen met every family member so I had to figure out a way for them to stand out. Thinking back to school/work events I decided on name tags! 

First I started at our local party store. I found buttons that were for the bridesmaids, but there were none for the groomsman. Then I found “write-on” ones but those looked crappy. So I thought why not make them myself? I found some pretty blue and orange flowers and decided to go to town!

Here’s how I made them:

In PowerPoint I made the tags with a pretty font and printed them out on white paper. I made tags for the bridesmaids/groomsman, parents of bride/groom, and one for my fiance and I. I made the fonts in alternating colors to distinguish which side of the wedding each person was on.

 I then cut the tags out and clued them onto colored card stock to add some stiffness/color.


Next using a pin or needle, poke a hole in the tag where you want your flower or embellishment to go.


Stick the flower/embellishment thorough the hole and pull being careful not tear the tag.


Bend the wire over, cute with some pliers, and cover the wire with tape.


Using hot glue and a scrap piece of paper; glue a safety pin to the back of the tag.


 Repeat till you have enough tags!


The tags were a big hit at the engagement party. You can also use them at other events such as Showers, Rehearsal Dinner, Bachelor/Bachelorette Parties and even Wedding Dress Shopping!


Tuesday, July 17

Just Banana Ice Cream


 It's summer time and the thing I love more than any thing else is ice cream. The only problem is that I'm planning a wedding and ice cream is not the healthiest option. But what is a healthy option? Bananas! What if you could have  ice cream that was made with just bananas and nothing else? Well guess what? You can! All you need are bananas (plus some chocolate powder if you really want to).


First chop your bananas into small pieces.


Next freeze your bananas for at least one hour.

Using an Immersion Blender or food processor, beat the bananas until smooth like ice cream.


Add chocolate powder, and blend the bananas until fully mixed, (you can skip this step if you want).


Freeze the bananas again until solid.

Once the bananas are solid, scoop out and enjoy as you would ice cream.


What is your favorite type of ice cream?

Friday, July 13

S’more Stuffed Chocolate Chip Cookies


“Who put a s’more in my cookie!?” Well I did of course! What wouldn’t be better than my two favorite loves combined into one wholesome bite?


 To make this wonderful creation you need:
  • A batch of chocolate chip cookie dough
  • Graham crackers
  • Hershey’s Chocolate
  • Mini Marshmallows.
 First make the dough following whatever recipe you prefer. Or if you don’t have time or are just feeling lazy can use store bought dough.


Once your dough is made here comes the fun part.

Break the graham crackers into small pieces about the size of one Hershey square.

Assemble Mini S’mores using the broken graham crackers, a single Hershey squares, and two mini marshmallows.


 Next get two scopes of dough, each a little smaller than a golf ball. Place on top and the bottom of the smore.


 Now the messy part. Do your best to wrap the s’more in cookie dough.  (Try to keep your s’more level, because you don’t want a sideways s’more once its cooked)


 Place on a baking sheet and repeat.

Cook the cookies at the normal temperature and time you would per the dough’s directions. Keep adding a few minutes until the cookies start to brown around the edges.


 Take them out and enjoy! I bet you will want s'more!

 What is your favorite way to eat a S'more?

Engagement Photos

EEK!!! I was so excited when our engagement photos came in the other day. Our photographer Jessica Pledger did an amazing job and we had so much fun with her.

Since taking engagement photos was clearly something I wanted to do, I let David pick the places. Our first location was the Minute Maid Stadium. David loves the Astros, and since we have been there many times together it was just the perfect place.


Next we headed to the Theater District in Downtown Houston. We took pictures on a Sunday so it was completely deserted and got some great shots out of it.


Finally we headed to Sam Houston Park to get some skyline pictures:


Tuesday, July 10

Will you be my Bridesmaid?


After I made the will you be my bridesmaid cards I realized that it just wasn’t enough. The girls mean so much to me and I really wanted to make them feel special. So I decided upon this:


I bought most of the supplies at Hobby Lobby. The whole project cost around $30, including the cards.


First I started with some paper mache boxes. They didn’t have 5 boxes in the same size, so two of the girls got oval boxes, the other 3 got square.

I then lined them with some tool in my wedding color. On top of that I placed a layer of tissue paper.


 Next came the fun part. Inside I placed:
                “Will you be my Bridesmaid?” Cards: To ask them the question.
    Ring Pop: Because I was asking them the big question.
                Tissues with their initial: Just in case they cried.
                Bubbles: To Celebrate with.

  
I then wrapped the tissue paper around all the gifts and tied the tool into a bow.


Next I found some adorable butterflies to top the gift with.


Finally put the top on the box and wrap with some more tool.


 Make sure you mark each of your boxes. I made that mistake and had to open all of them to see who the went to!!


Just so you know, all of my bridesmaid said yes!


How will you ask your bridesmaids?

Monday, July 9

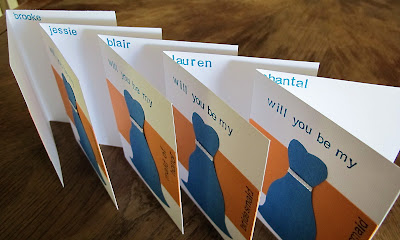
"Will You be my Bridesmaid?" Cards


After David asked me the biggest question of my life I had to find a way to asks my future bridesmaids that was just a special. After searching the internet high and low I decided to make them some homemade cards with a special message inside that told them just how special they were to me.

Here's how I made them:

Supplies
Cardstock
Colored paper
Ribbon
Sissors
Glue
Stamps

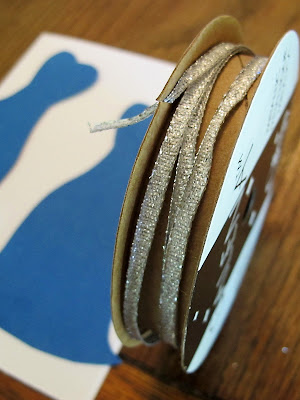
Sketch out a bridesmaid dress.

Cut out, and trace onto colored paper.

Using ribbon, make a "belt" around the waist.

Cute dresses!
Cute out a background for the dress so it stands out.

Using stamps, write what ever message you want.
Glue it all together!

Admire your handy work, and personalize for each bridesmaid.

Related Posts Plugin for WordPress, Blogger...